
One of the most frustrating things about having tons of files stored all across your computer is when suddenly you desperately need to find something and the name of the file completely escapes your mind. You are sitting there with the knowledge of what the file contains within, but can’t remember what you named it. This is a good time to have Windows search file contents. You should enable Windows search to look within file contents because you won’t always remember a file name, but when you need a file you will at least have some idea of what the file contents are.
Search for key words inside the content of any file.. .docx, .xlsx, .pdf and more!
File contents in indexed folders
In Windows Search, keywords can be found even in file contents, but only in folders that allow their file contents to be indexed. To enable Windows Search to search new file content, you can add the desired folder location to the index. With a click on the right mouse button on the desired folder, the file explorer opens where the properties box can be selected. Under the “General” tab there is an “Advanced” option, a tick in the box next to “Allow” for files in the folder to have contents added to the index as well as file properties.
Include the file contents of all folders with Windows Search
You can also give Windows Search the task of searching file contents even in non-indexed folders. For this to happen, the “Folder Options” need to be changed. This is very easily by entering “Folder Options” into the search field of the Start menu. There, under the “Search” tab, select “Always search file names and contents”, which can be activated by clicking on the circle. This option is provided with a notification that the process may take several minutes. This is because the index needs to be rebuilt, which takes time.
Add file contents of certain files to Windows Search
Outside of these two methods, there is also an option to search the contents of only selected file types.
To have Windows search in files, you will need to make some changes to your settings. To do so, just follow these steps:
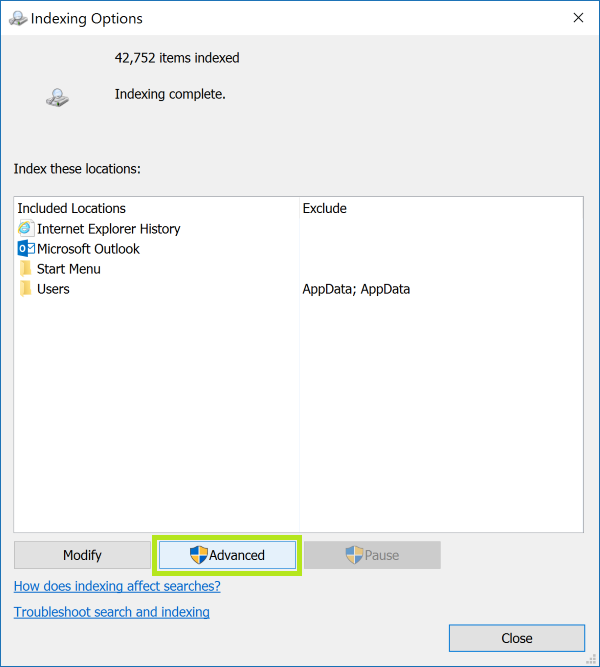
- First you will need to go into your Control Panel. Find and open the Indexing Options.
- When you’re in the Indexing Options click on the Advanced Button.
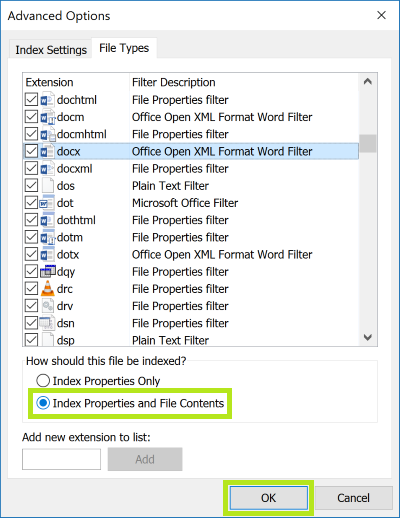
- When you are in the Advanced Options window, click on the File Types tab, and choose all the file types you want to have Windows Search in Files.
- When you have selected all of the file types makes sure to click the radio button that says “Index Properties and Files Contents” for each selected file.
You will need to let the index rebuild before trying to let Windows search file contents.
If you want to stop thinking about the question of content of files, file types and indexed or non-indexed folders, it’s best for you to use an alternative to Windows Search. Lookeen searches automatically, for example, all file content on all drives, the entire network, and in Outlook and Exchange servers. Your data is immediately available, thanks to real-time indexing and with the help of special features, search results start to appear even as you type.


Comments
another way to search faster is by using KrojamSoft FilesSearch